Make It With Beads - Chair
Make It With Beads:
Chair:
The next post under the label 'Make It With Beads' after the table is chair. When I had an idea of making a chair with beads, my mom had made different types of chairs in different designs. So, I had a model to make the chair with beads. But I wanted to. make a type of chair which my mom had not made. So I thought of making a chair that matches the table with pedestal leg and tripod base that I made previously. Hence I made the chair also with a pedestal leg and the tripod base with a small armrest. This chair with the table is a perfect thing to be placed in the showcase. Let us now check out the method of making the chair with beads.
Materials needed:
- Beads - 2mm (dark green and light green beads)
- String / Wire - 0.3mm / 0.4mm
- Needle - Very small (suitable for both)
- Scissors
Method:


- Take a desired length of string. Insert the one end of the string into a needle and make a knot at the other end of the string.
- I am starting the chair from the body which has two sides.
- Start making the 4 beaded structure with dark green colour beads.
- Take 4 dark green colour beads and insert the needle back into the first bead to make the first 4 beaded structure of the first row.
- Then take 3 dark green beads to make the second 4 beaded structure.
- Similarly take 3 beads three more times to make 3 more sets of 4 beaded structure in the first row.
- The first row has 5 sets of 4 beaded structure.
- Then move on to the second row by taking 3 dark green beads and make 4 beaded structure from the one bead from the first row.
- Then for the second 4 beaded structure of the second row, just take two beads.
- Continue the similar steps and complete the second row with dark green beads.
- Then we move on to the third row with light green beads and the other steps are the same as for the second row.
- We have to make a total of ten rows with five columns.
- The making of the rows are the same. Just remember to make the third row and the eighth row with light green beads.

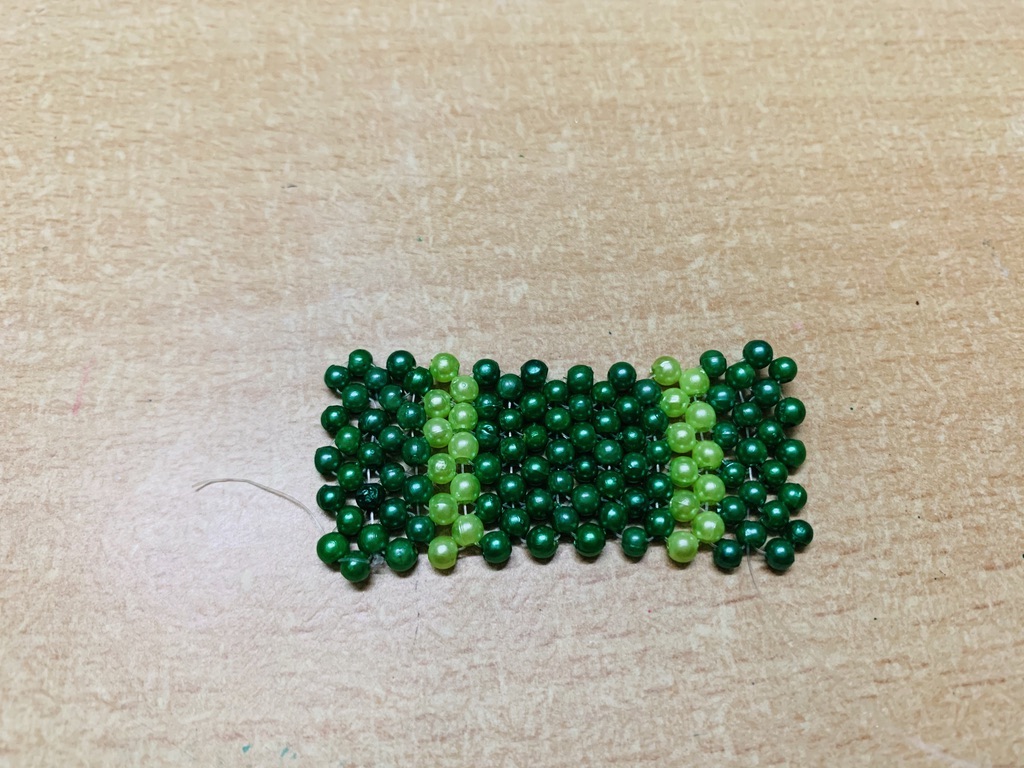
- Repeat the same steps to make the 4 beaded structure until we make the ten rows.
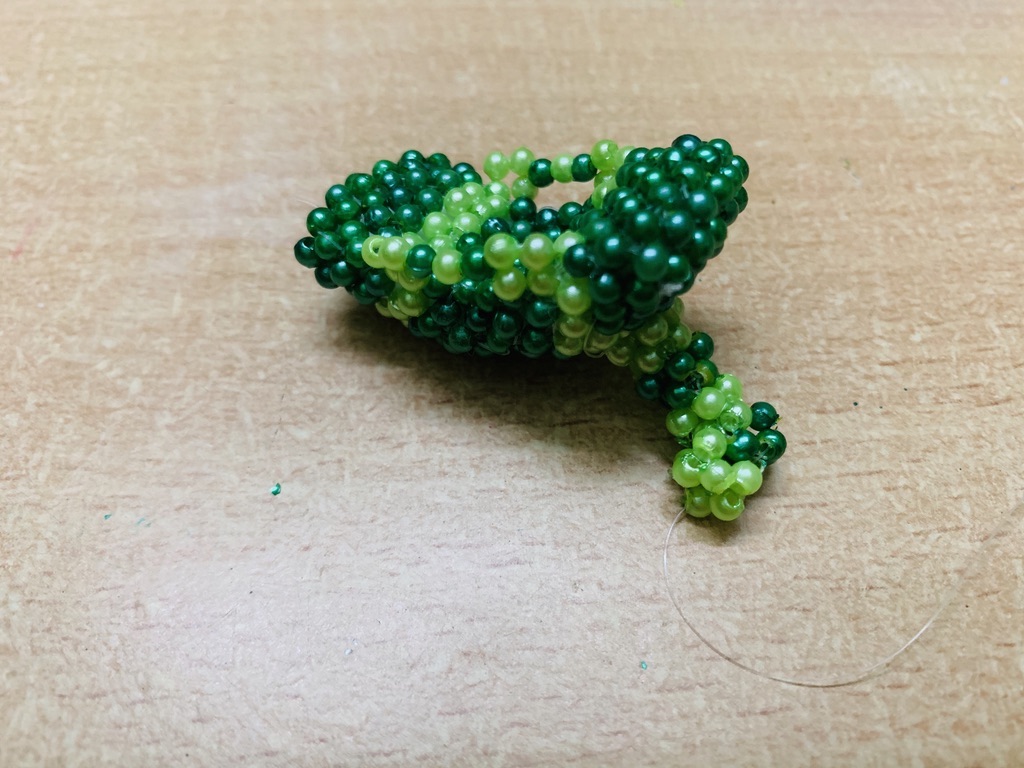
- Once all the ten rows are made, we have to do the bend for the chair.
- Among the ten rows we made, five rows are for the seat and the five rows for the back rest.
- Insert the needle into the bend at the sides from the opposite sides tightly. This makes the chair shape perfectly.

- Make another set of 10 rows and 5 columns with the same dark green and light green beads having the third and eighth row with light green beads.
- Now join the newly made set with the chair shape made previously.
- The joining process is the same as making the 4 beaded structure. Two beads are got from the top and bottom chair and just add 2 more beads at the sides.

- When three-fourth of the seat and back rest has been joined, stuff it with cotton.
- The important thing to be kept in mind while stuffing is, do not stuff the chair with lots of cotton in whole to avoid a flabby look.
- Just stuff the seating part fully and then the backrest part separately and a little amount of cotton in the middle bending part.
- This ensures the chair shape to be retained.
- Now, follow the same steps as before and complete the joining process.
- To make the chair shape more distinct, insert the needle into the beads at the middle between the seat part and the backrest randomly several times tightly. This helps to form chair shape perfectly.
- After this we move on to making the armrest of the chair.
- There will be two strips made with light green beads in the seating part and the backrest.
- The easiest way to make the armrest for this chair is to make one vertical 4 beaded structure on either sides of the two light green strips. So totally make 4 sets of 4 beaded structure.

- Now connect the two 4 beaded structure from the seat part and the backrest with beads.
- It is not necessary to make any 4 beaded structures. From one 4 beaded structure just take 3 beads such that one dark green and one light green and one dark green beads and insert the needle into the top of the. other 4 beaded structure at the same side and join.
- Now repeat the same steps and make another armrest at the other side of the chair.
- Next we move onto making the legs for the chair. I am making this chair to match the table we made in the last post.
- So I have made the legs with a central pedestal leg and four base legs.
- Bring the string to the central 4 beaded structure at the base of the seat part of the chair.
- To make the pedestal leg, make 4 complete sets of 4 beaded structures from the 4 beads of the 4 beaded structure at the base.
- From one bead, make the first 4 beaded structure with 3 beads and from the second and third bead, make the second and third 4 beaded structure with 2 beads.
- The fourth 4 beaded structure is made from the 4th bead by taking just one extra bead.
- This is the first complete set of 4 beaded structure.
- Make 4 complete sets of 4 beaded structure alternating with dark green and light green beads. When this is done, we make the 4 base legs.
- At the end of the central pedestal stand, there will be 4 beads frommwhich we make the 4 base legs from each beads.
- From each bead sets, we have to make 4 complete sets of 4 beaded structures with alternating colours.

- So totally we have to make 8 complete sets of 4 beaded structures with 2 complete set in each bead.
- When finished, the legs will not be strong enough to stand on its own. Take som top chemical free match sticks or toothpicks and insert them into the pedestal leg and then base legs.
- Now a very beautiful Chair made with beads is ready. 😊
I hope you enjoyed reading the method of making the beautiful chair with beads. The video of making the chair has been given at the beginning of the post. Refer the video for more clear understanding. When you had any doubts while making this chair with beads, please feel free to let me know in the comments. If you are successful in making this, share the pictures with me. I will be very happy to see all your finished pictures. And don't forget to subscribe to my YouTube channel and share the blog with your friends and relatives.
I wish you all "Happy Creating..!!!" 😊
Pl upload more videos of tutorials in beads craft of God’s
ReplyDeleteSure :)
ReplyDelete