Make It With Beads - Dog
Make It With Beads:
Dog:
The next post under the label 'Make it with Beads' is making of a little dog with beads. When I was learning to make things with beads, I found making of dog to be little harder. It has so many counting of beads for the body and making of the neck and face which was really challenging. But once I made it for the first time, I was actually amazed seeing the cuteness of the little dog and felt very much happy that I have made it. After that, dog is one of the things I have made the most number of times. This dog can be placed as it is in the showcase or can be used as a keychain by adding a beaded chain to its back. Now let us check out the method to make the cute little dog with beads.
Materials Needed:
- Beads : 2mm (White, Red, Black colours)
- String / Wire : 0.3 mm / 0.4 mm
- Needle : Very small (Suitable for the beads and the string)
- Scissors
Method:

- While making the dog, it can be started from the body or the face or the legs. I used to start from the legs because I learnt this way and I find it easy to proceed.
- Take desired length of string and make a knot at one end and insert the needle at the other end.
- I am starting from the bottom of the legs. So take 4 red beads in the needle. Insert the needle back into the first bead to form the 4 beaded structure.


- Then we make the legs in white colour beads. Take 3 white beads and insert the needle into the red bead.
- This makes a 4 beaded structure vertically.
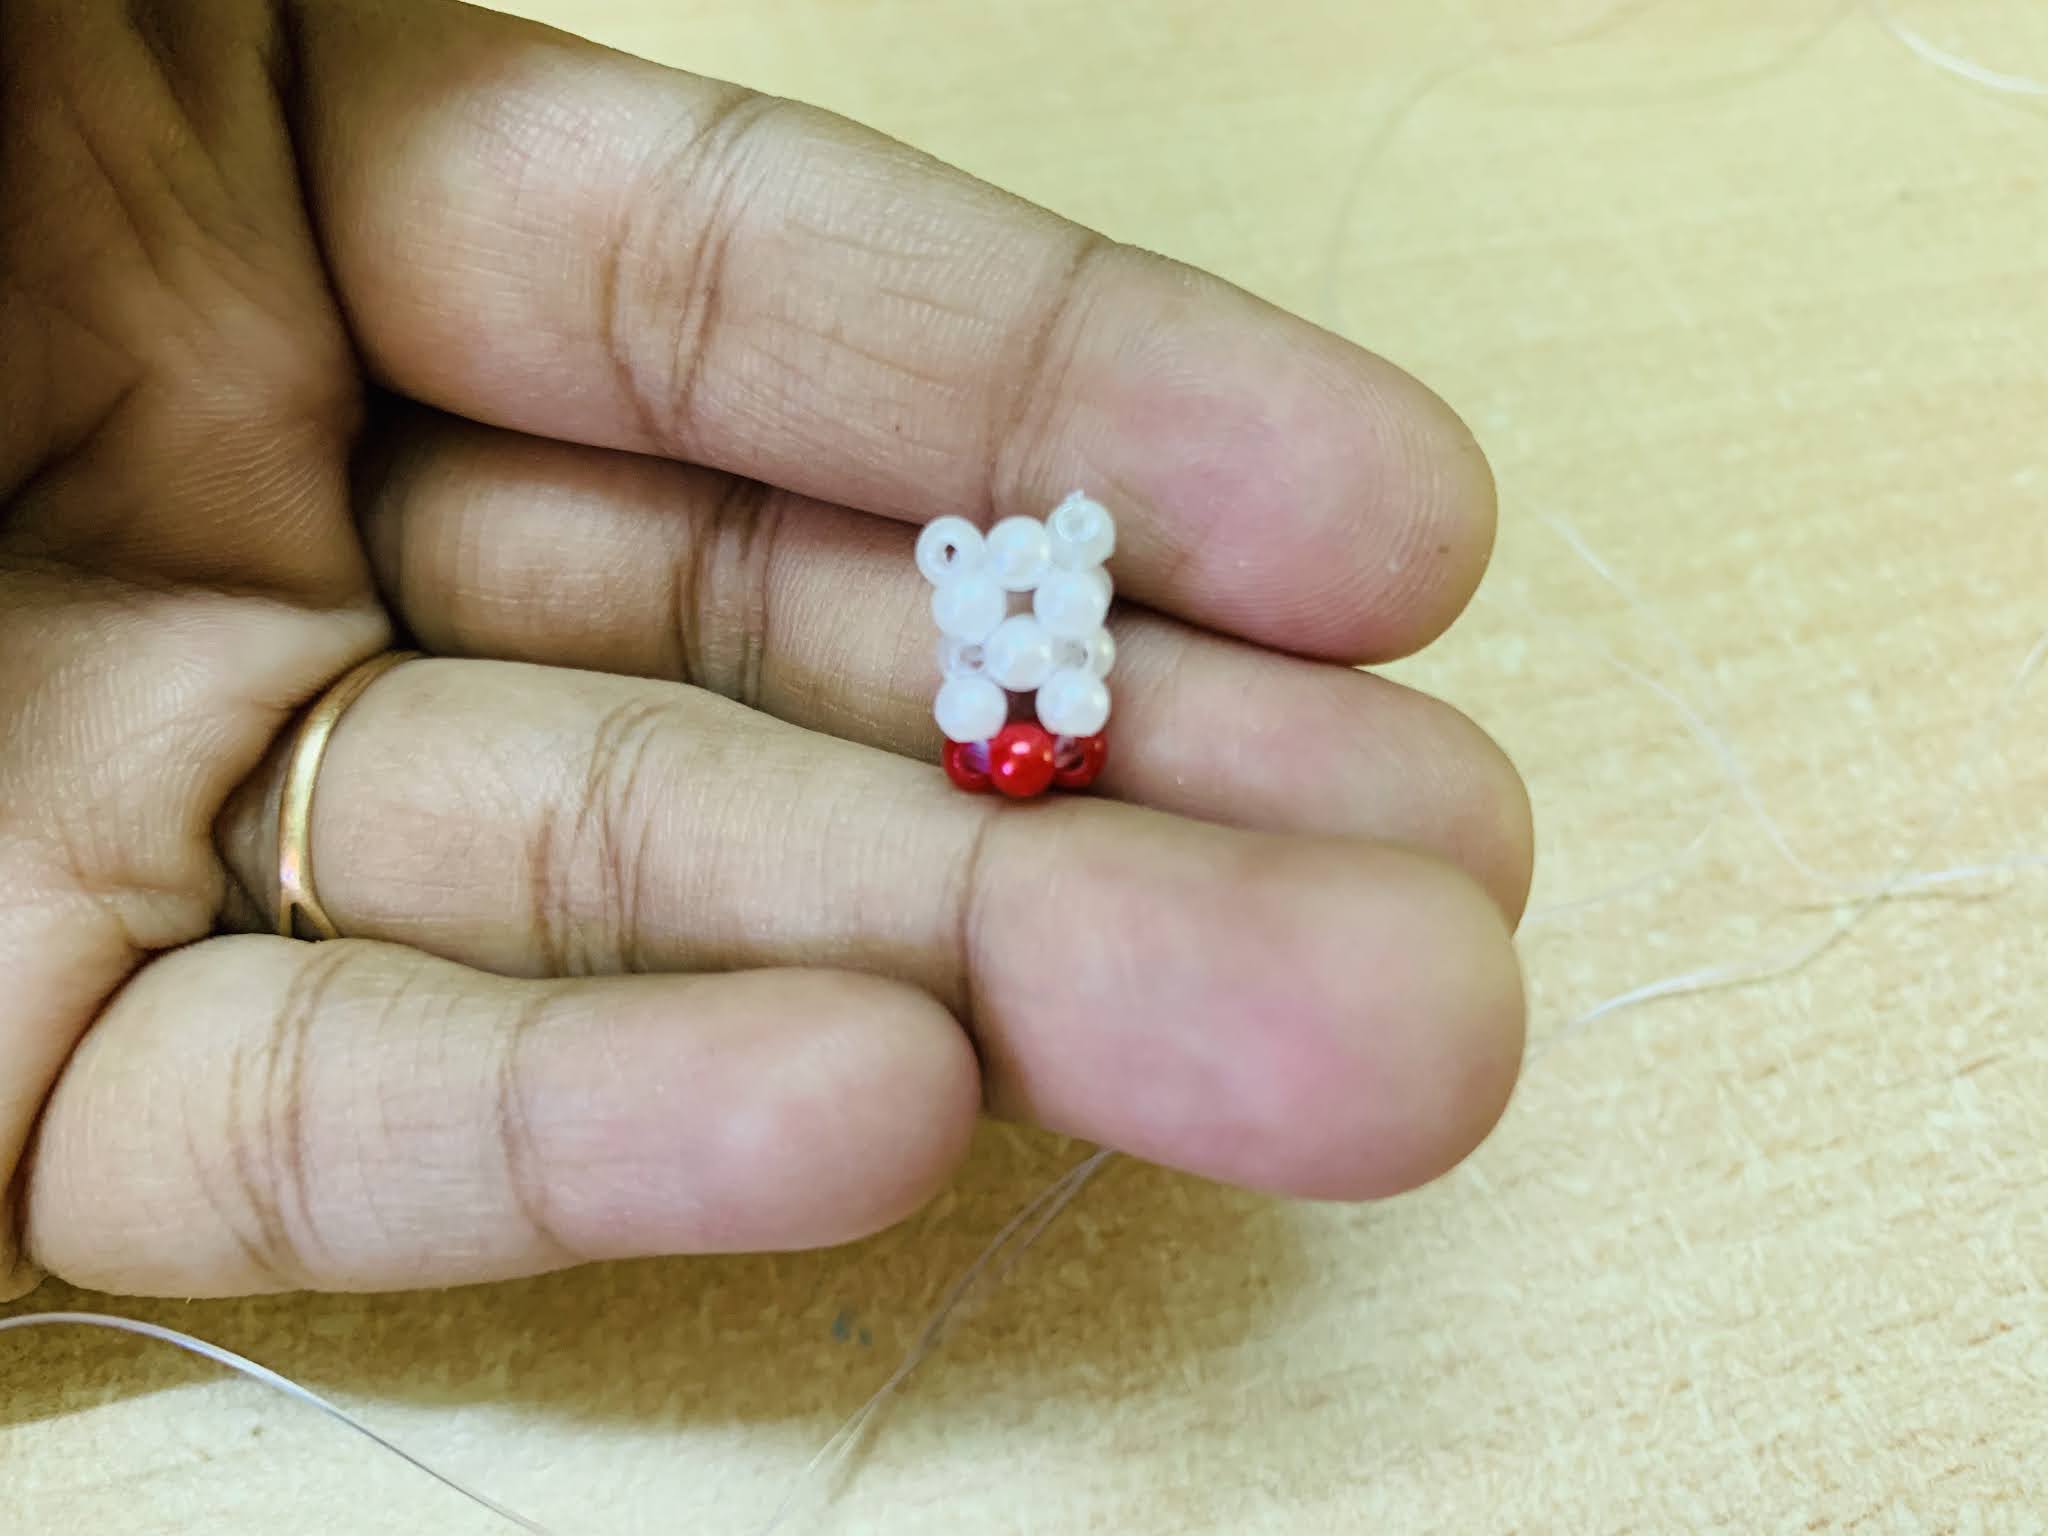
- Then take 2 white and make another vertical 4 beaded structure in the next red bead.
- Again in the next red bead, to make another vertical 4 beaded structure, we take 2 white beads.
- The fourth vertical 4 beaded structure needs just 1 more white bead to be added. Because the other 3 beads are got from the previous 4 beaded structures that is a red bead at the bottom and 2 white beads at each sides.
- So, we have to take just 1 more white bead at the top to make the fourth vertical 4 beaded structure.
- Follow the same steps to make another 4 sets of 4 beaded structure above this one.
- Then we move on to making the body of the dog above the leg made.

- To begin with the body, we have to make 2*5 sets of 4 beaded structures.
- Begin with, taking 3 beads in the needle and make the first row of 4 beaded structure.
- Then continue the second row also by taking 3 beads in the needle. The 2 rows form the first column.
- Next move on to the second column and make the 4 beaded structure with 3 beads and then the next one with 2 beads.
- Continue the same steps to make the 5 columns and 2 rows for the body of the dog.
- This is the one side of the body of the dog. At the bottom of the 5th column, we have to make the another leg.
- The leg is done in the same way as before with 2 complete sets of 4 beaded structures.

- The first set is full of white beads and the next with the bottom end containing red beads.
- The other side (adjacent side) continues with the back side of the dog.
- On the top of the adjacent side of the second leg made, we have make 3*3 sets of 4 beaded structures.
- At the bottom end of the 3rd column of the back of the dog, the third leg should be made. The process of making leg is the same as before.

- The next steps to complete the legs and body of the dog are the same as we did before for the other legs and rest of the body.
- Both the sides of the body of the dog has 2*5 sets of 4 beaded structures and the front and back side of the dog has 3*3 sets of 4 beaded structures.
- At the four corners, we have the legs.

- Once this I done, we have to cover the bottom portion of the body of the dog, which has 3*5 sets of 4 beaded structure when seen horizontally.
- Among the 3*5 sets of 4 beads structures, all the border beads are already there which are formed while making the body and legs of the dog.
- Now, the job is just to fill the beads that are not there to complete the 3*5 sets of 4 beaded structures.


- When the bottom part is covered, we have to cover the top part of the body. The top part should be covered only half way while the remaining is continued to make the neck of the dog.
- So, at one end of the top side of the body, we have to make 3*3 sets of 4 beaded structure.
- The body of the dog is generally made of 2 rows and 5 columns.
- Among the 5 columns, we make the last 3 columns for covering the top part of the body. That is the 3*3 sets of 4 beaded structures.
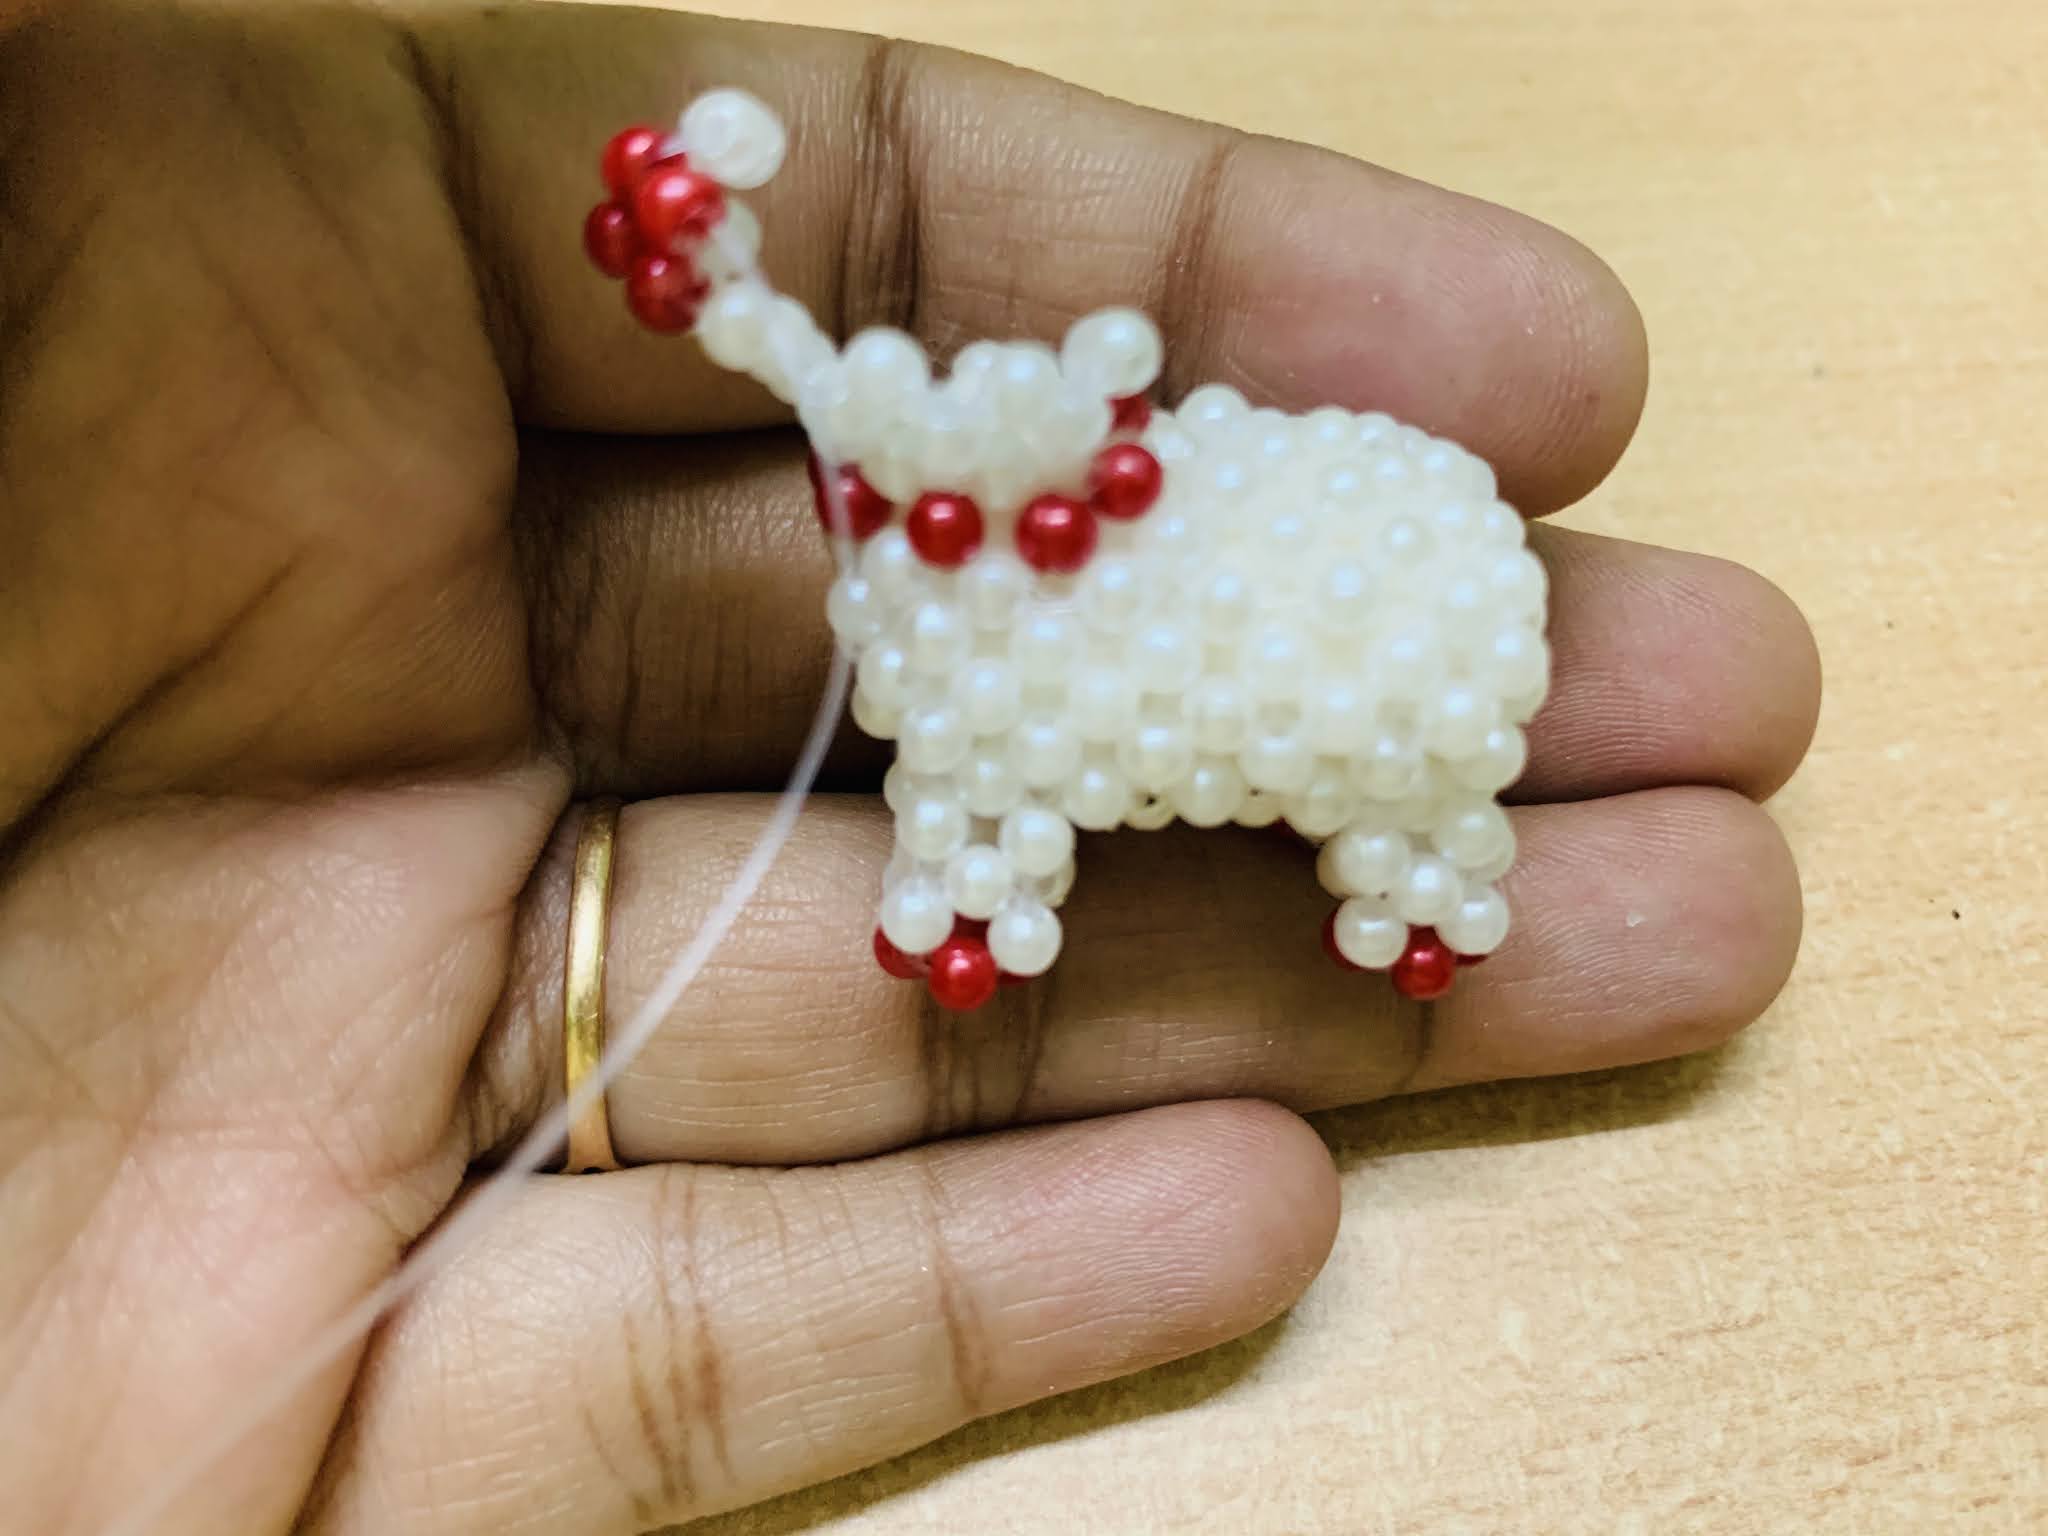
- When this is made, next we move on to make the neck of the dog and the collar.
- I make the collar with red beads. This procedure also involves making just 4 beaded structures.
- There are 8 red beads in the collar of the dog. This means, we have to make 8 sets of 4 beaded structures.
- First time you have to take 3 beads among which 2 red beads and 1 white bead in the middle to make the 4 beaded structure.
- Then the next 4 beaded structures are made just with 2 beads in which one white bead and one red bead are taken.
- Once the entire collar of the dog has been made, there will be 8 red beads.
- There will be a small opening in the neck. Stuff the whole body of the dog with cotton through the hole in the neck. Stuff the dog with cotton really well to give it a nice fluffy look.
- Then we move on to make the face and head of the dog.
- When we have finished the collar of the dog, there will be 6 white beads in between the 8 red beads of the collar.
- Among the 6 white beads, we have to make the basic 4 beaded structures only in the 5 white beads.
- The remaining 1 white bead will be near the mouth part of the dog.
- The process of making 4 beaded structures is the same by taking 3 beads for the one and 2 beads for the next sets of 4 beaded structures.
- In the 6 white beads in the mouth area, we will be making the same 4 beaded structures by taking 2 white beads and 1 red bead.
- This 4 beaded structure will be the bottom part of the mouth.

- Take 3 red beads and make one more 4 beaded structure from the 1 red bead bead previously used.
- On each side of the mouth made with red beads, make 2 more 4 beaded structure with 3 white beads.
- These 4 beaded structures made should be joined with the 5 sets of 4 beaded structures made previously.
- Next we move on to make the eyes of the dog, neither sides of the mouth.
- Starting from the mouth, make one 4 beaded structure on the top of the mouth in the centre.
- On either sides of the previously made one 4 beaded structure, make 2 sets of 4 beaded structure with one black bead.
- The 2 sets of 4 beaded structures are usually made by taking 3 beads in the needle.

- Among the 3 beads, one bead should be a black bead which will be the eyes of the dog.
- Then we continue making the entire row by making the remaining 4 beaded structures.
- The process of making the 4 beaded structures are the same as the basic by taking 3 beads and 2 beads.
- Now there will be a small opening on the head.
- Stuff the head with cotton or other stuffing materials through the small opening.
- Stuff the head really well to match the body of the dog.
- Then finish the head which has the opening of 3 sets of 4 beaded structures.
- So make 3 sets of 4 beaded structures on the top and finish of the head of the dog.
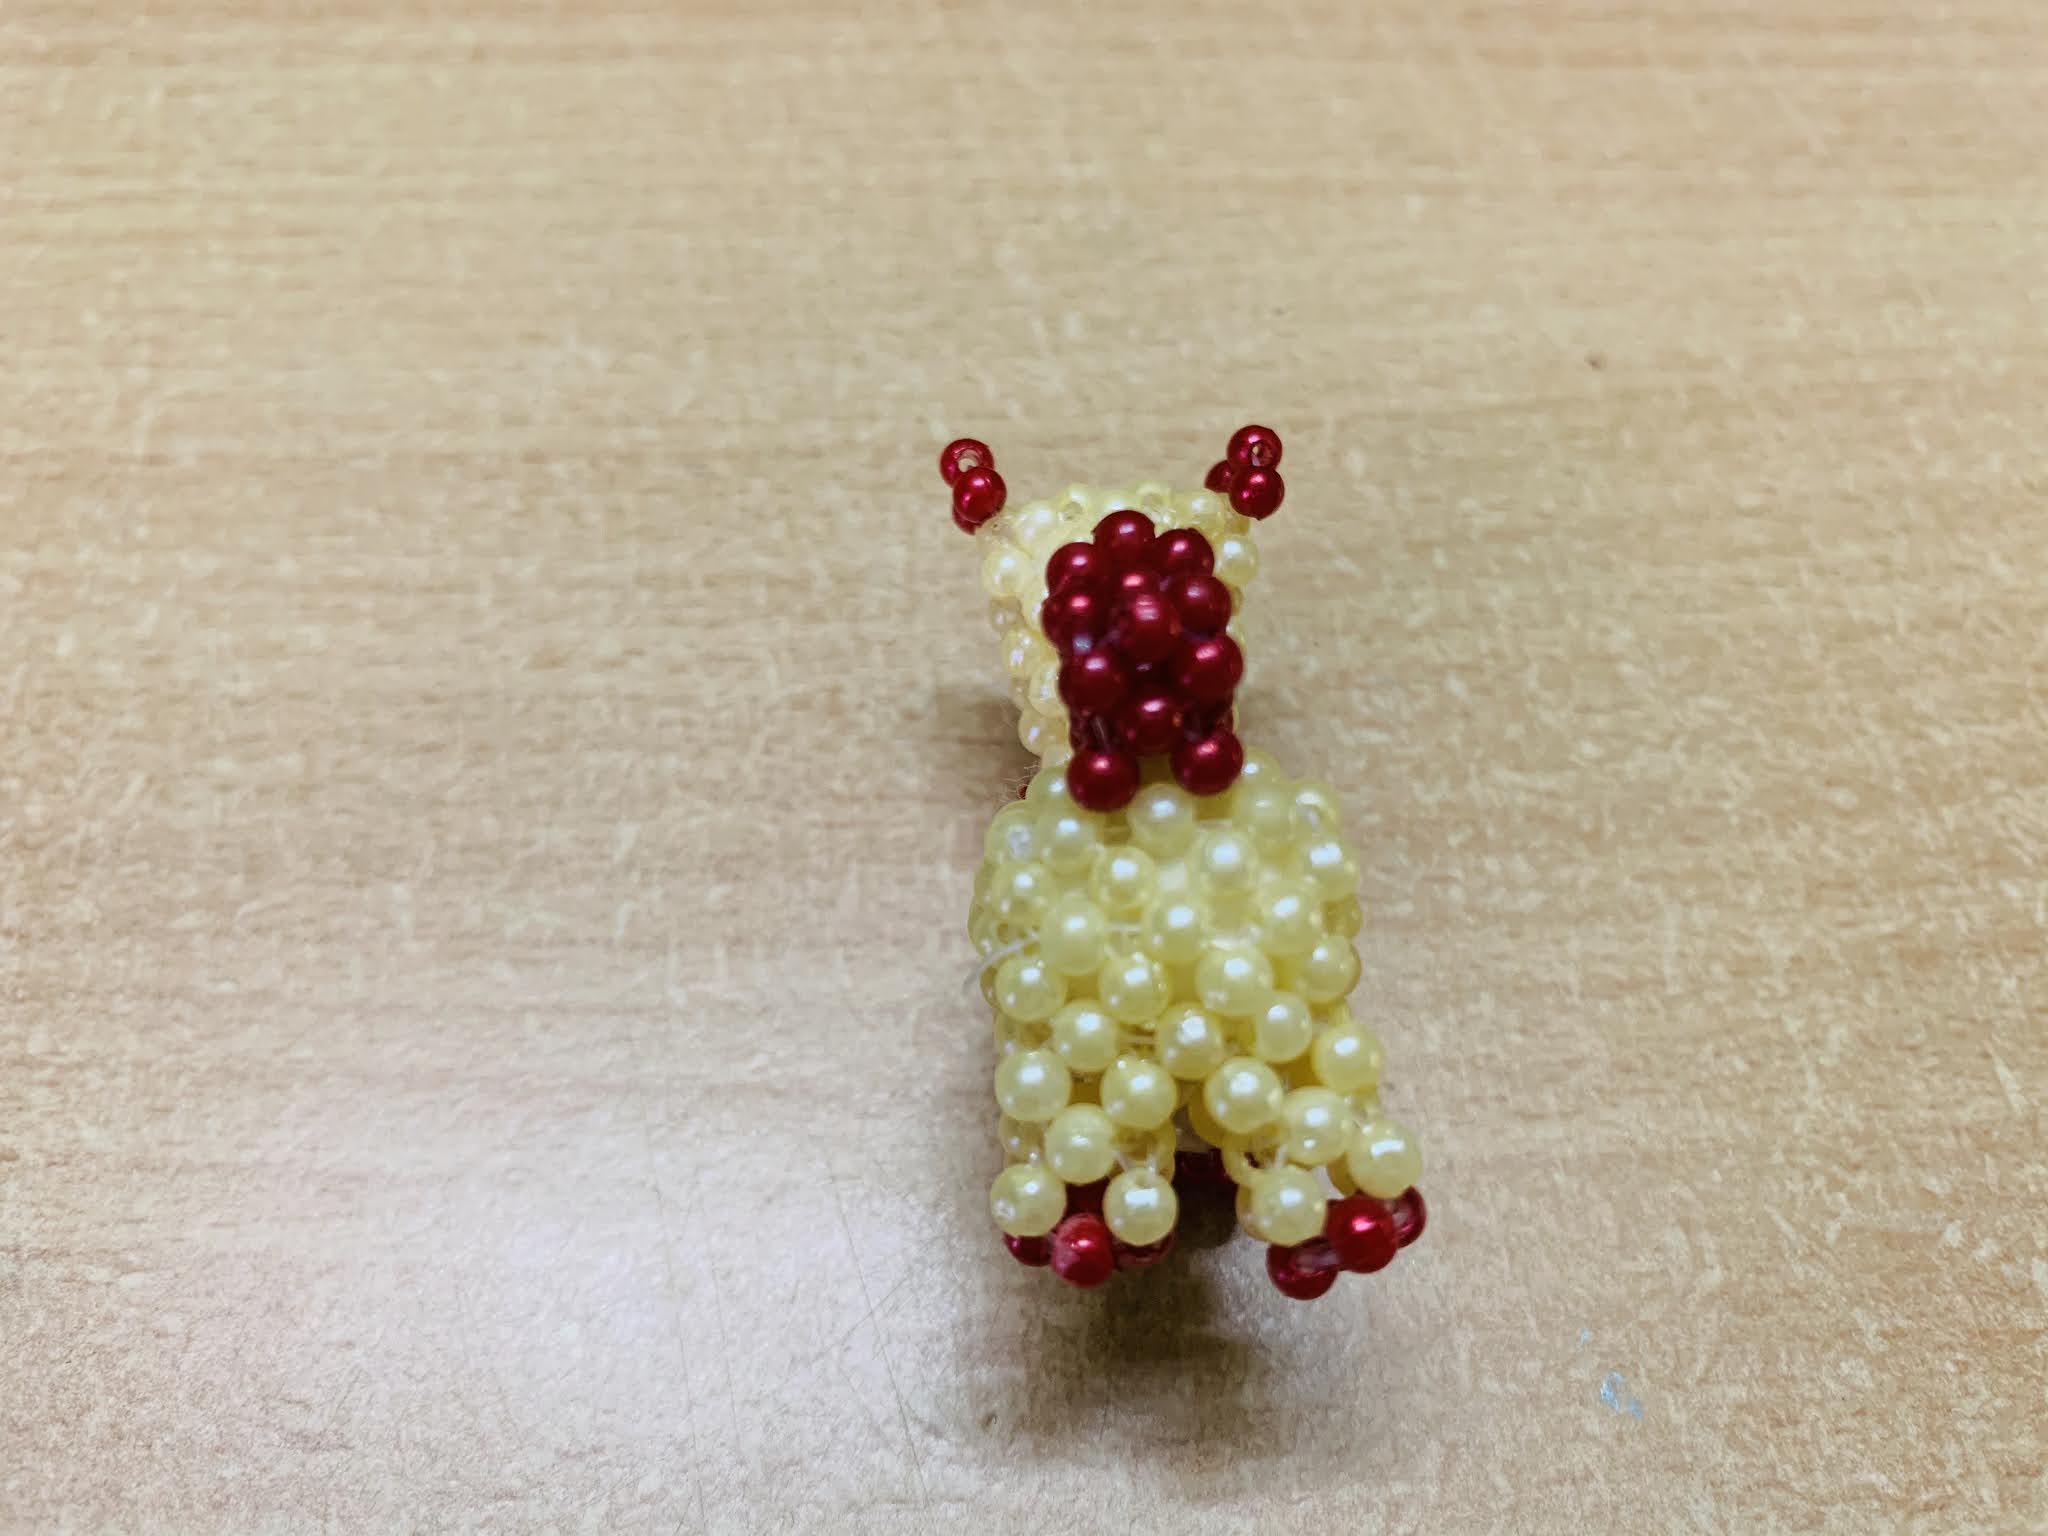
- Now the head of the dog is completed and let us move on to make the ears of the dog.
- The ears of the dog are made with red beads at the sides of the 3 sets of 4 beaded structures lastly made.
- Bring the string to one side of the first set of 4 beaded structure over the head.

- Take 3 red beads and insert the needle into the same white bead of the previous bead on the head.
- This makes one of the ears of the dog.
- Similarly move on to the 3rd set of 4 beaded structure on the other side of the head.
- Make the other ear of the dog by taking again 3 red beads. Now both the ears of the dog are done.
- then let us move on to make the tail of the dog at the back side.
- Bring the string to the central 4 beaded structure of 3*3 made at the back.
- At the base 4 beaded structure, make 2 sets of 4 beaded structure vertically on each 4 beads at the base.

- This should be made exactly like the legs of the dogs.
- Then at the top of the 2 sets made in the sideways, make one whole set of ( 4 sets ) 4 beaded structures horizontally.
- Tail of the dog is made😊.
- Make a knot by inserting the string randomly into the beads. Insert the remaining string into other beads. This ensures a tight knot and cut off the excess string.
I hope you enjoyed reading the steps in making the cute little dog with bead. Keep up the interest and try to finish the dog. If you have any doubts regarding the steps in the process of making the little dog with beads, let me know in the comments. I am eagerly waiting to answer 😊. If you are successful in making this, please do share the pictures with me. And do share the blog with your friends and relatives.
I wish you all "Happy Creating"!!! 😊
More Videos: YouTube


Add some majestic flair to your office with a Throne Office Chair that combines comfort and luxury in one.
ReplyDelete